History
Ralf and I have been using a two person sleeping quilt instead of sleeping bags since 2006. I made one from a kit before our first bicycle tour and we’ve been using it ever since. It weighs 3.37 pounds and is of the synthetic variety. It has served us well in temps down to freezing.
Originally I was hoping just to add an extra thin synthetic blanket that Max could use(folded up to make it warmer and more sleeping bag like). I figured when it got cold we could add it to our quilt and put him in between to make sure he was warm and cozy. When I pumped up our new sleeping pads to figure out our sheet system I made Ralf and Max lay down with me to check out the blanket/quilt combo. It just didn’t feel right not to have one big blanket that comfortably fit over all three of us.
So the search was on for a three person quilt kit. Keep in mind that sewing was not something I really know how to do properly or something I was really interested in taking on at this point. AND there was no quilt kit to be found that could be made that wide. No kit meant I needed to buy all the materials myself.
This was a big deal. I couldn’t count on preselected anything so I had to figure out what kind and how much fabric, insulation and zipper I would need. I won’t go into the painful details and long nights of research that culminated into my final decisions but lets just say there are a dizzying array of options and I relied heavily on the ultralight backpacking forums in the DIY sections.
Materials
FABRIC- Momentum 90 T (.9oz Black Taffeta) treated with DWR from Thru Hiker Originally I ordered non DWR 1.1oz ripstop from Backwoodsdaydreamer.com DIY Gear Supply but was convinced by some online posts that I would be happier working with and sleeping under the Taffeta. With the DWR coating the Taffeta ends up at pretty much the same weight but it is supposed to have a nicer feel or hand. Plus it was black so I felt better knowing that my stitches would be harder to see.
I wanted to avoid the DWR coating even though everyone seems to like it. It is bad enough that all our gear is pretty much plastic other than our wool long underwear. I really didn’t like the thought of being surrounded in water resistant chemical coatings but it is hard to find this type of material without it.
Both companies shipped fast and were easy to deal with but DIY Gear Supply went above and beyond by actually refunding some of the shipping cost on their own accord when they packed it up and got a better rate. Speaking from an Alaskan perspective of shipping nightmares this is AMAZING!
INSULATION- Primaloft One 3oz from Seattle Fabrics
This was a leap of faith in more ways than one. We wanted to stay with synthetic insulation but our old quilt was made from Polarguard(now called Climashield I think) which is a continuous filament insulation. It is warm, simple to work with and has nice loft BUT it is a space hog (no reference to the Muppet Show intended). A quilt the size of the one I wanted to make would be HUGE if I used the same insulation.
Primaloft One is supposed to be the closest to down for warmth and compressibility. The catch is that because it is a short staple insulation it must be quilted on two sides to remain stable. The Climashield stays put with quilting loops which are WAY simple. If Primaloft One is quilted through both the top and bottom layers of the quilt there will be cold spots on the stitch lines.
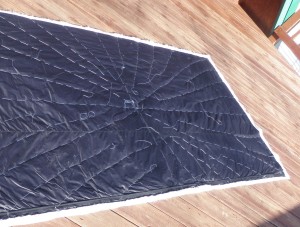
I ordered two layers of 3oz Primaloft One and I’m in the process of quilting one layer through the lightweight scrim included with the insulation to the top piece of fabric and one layer of insulation to the bottom layer of fabric with offset stitching to avoid cold spots. This is a huge time commitment. Just hand basting the insulation to the fabric takes me two hours per panel and there are four panels total (remember there is a zipper- THANK GOD- that means I’m working with 45″ x 90″ panels instead of 90″x90″). So the big questions are: will I be able to pull this quilting thing off and will it be warm enough? It feels really thin.
Seattle Fabrics certainly doesn’t have the cheapest prices but they were the ONLY place I could find the Primaloft One. This was the first time I’ve placed an order without a shipping quote. They make you pay UPS shipping rate first with the promise to refund the USPS price difference in the end. UPS $102.72!!! The final cost was around $50 which was bad enough.
ZIPPER- 100″ YKK #5 One Way Separating Coil Zipper I knew exactly nothing about zippers just weeks earlier but now I can tell you with confidence that there are no #3 one way separating coil zippers on the planet earth over 72″ long (if you know about one please don’t tell me, at this point it is too late and will just make me sad). Needless to say a #5 zipper is a normal sleeping bag zipper but seems way overbuilt for the lightweight fabric I’m using. I thought about using two #3s but installing one zipper uses enough brain power as it is- ‘nuf said.
I ordered this zipper from Amazon.com fulfilled by Zipperstop.com I tried to find the same zipper on their website but failed. I’m sure it was there but if you want to get a feel for how many different types of zippers there are spend a few minutes on their site. Straight forward Amazon purchasing experience.
DIMENSIONS- 90″ x 90″ before quilting and sewing together Hoping for at least 86″ x 86″ finished. Our our old quilt is about 60″ x 86″. It has a curve, slightly 3D top edge and is tapered down to a sewn in foot box. I would like to keep this quilt full width and straight across the top. I think this will cover the three of us better at the top and by making the foot box optional with snaps when the quilt is unzipped each piece will be wide and long enough for one person to use as a blanket.
Updates
March 8th I’m really happy with how this project is coming along. Each phase has taken an incredible amount of time and has been crazy tedious but I’m actually enjoying it. It certainly ups the expectation factor for the finished product so hopefully all my dreams will come true.
I’m almost finished hand basting the insulation to the fabric.  I was worried about the holes left behind after the basting thread is removed so I actually basted a practice piece and quilted half of it so I could see how it will turn out. I’m really proud of myself for doing this because it is so not my normal MO to have the patience for this type diversion from the main project. The holes are there along with bits of the insulation pulled through but I think it will be less noticeable with time and I don’t know of an alternative that would make it possible to machine quilt this thin slippery fabric with any semblance of consistency.
I’m getting a feel for the fabric insulation combo and I like it. Of course part of me wants to start my first panels over to make them nicer but as Ralf pointed out no one will notice one more or less wrinkle in a wrinkly sleeping bag like object. Okay.
I did a little research on machine quilting and a special presser foot is recommended called a even feed/walking foot. I quilted half of my practice piece with my regular presser foot so I could remove the basting stitches and check it out before basting all four panels. It was really difficult to keep the stitch length even and the taffeta did bunch up a bit. This leaves the other half to quilt with my new walking foot that just arrived today. Update- not so impressed with the new presser foot ended up quilting with the regular presser foot- oh well.
It is pretty exciting to be at this point in the project. I need to decide on the pattern to use for the quilting. Squares are the easiest and I will use them for sure for the underside of the quilt but they are not my favorite. At this point I have A LOT of time, money and brainpower invested into this quilt so I’m thinking a little extra time and brainpower to make a design on top that is a somewhat more pleasing to me would be worth it. I think I should stick with straight lines to be safe- we’ll see. Again- ode to the practice piece. Tried some free motion quilting. This stuff is so slippery and hard to keep together squares were challenging enough. I’m learning to love the squares, so many squares.
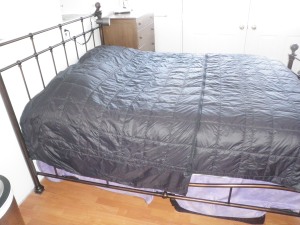
April 10th The quilt is done minus some hand stitching(to ensure the draft strip over the zipper stays put) and the foot box. It is tempting not to mess with a foot box at all. It was really helpful in our old tapering quilt to keep our feet warm and ensure they stayed under the cover BUT this thing is HUGE. 
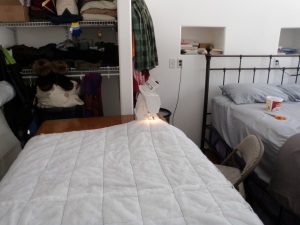
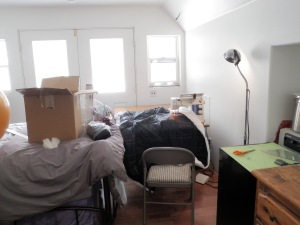
When I finished the sheet last weekend I talked Ralf into spending the night on the floor next to our bed. I wanted to check out how the pad/sheet/coupler combo worked together and try out the quilt over all three of us. I’m pretty happy with it- no one was left out in the cold. Plenty room to roll over comfortably.
My biggest concern is whether or not it will be warm enough but it is intended only to be used down to freezing or so. We can always bundle up in our coats if we hit some cold spells.
It weighs in at 3.94 pounds. Not spectacular for lightweight gear but considering the luxury size not bad. It packs down smaller than our old quilt and is only 9.12 ounces heavier- mission accomplished. 


WOW. That looks like a ridiculous amount of time and effort, but I bet it was definitely worth it! Want to make one for me? 😉